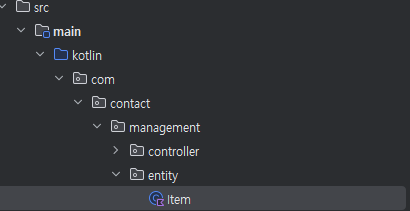
1. application.properties 파일 삭제후 application.yml 생성


2. h2 메모리 내 데이터베이스용으로 생성
application.yml
spring:
  # H2 Console 설정
  h2:
    console:
      enabled: true  # H2 Console을 사용할지 여부
      path: /h2-console  # H2 Console의 접근 경로

  # 데이터베이스 설정
  datasource:
    driver-class-name: org.h2.Driver  # H2 드라이버 사용
    url: jdbc:h2:mem:management  # 메모리 내 데이터베이스 (테스트용)
    username: sa  # 접속할 사용자명
    password:  # 비밀번호 (없으면 공백으로 설정)

  # JPA 설정
  jpa:
    hibernate:
      ddl-auto: create  # 테이블 자동 생성 및 업데이트 (설정에 따라 'none', 'update', 'create', 'create-drop' 등이 가능)
    show-sql: true  # SQL 쿼리를 로그에 출력
    database-platform: org.hibernate.dialect.H2Dialect  # H2 데이터베이스용 Hibernate Dialect 설정
    properties:
      hibernate:
        format_sql: true  # SQL을 보기 쉽게 포맷
3. entity 패키지 생성후 Item.kt 생성

Item.kt
package com.contact.management.entity

import jakarta.persistence.Entity
import jakarta.persistence.GeneratedValue
import jakarta.persistence.GenerationType
import jakarta.persistence.Id

@Entity
class Item(
    @Id
    @GeneratedValue(strategy = GenerationType.IDENTITY)
    val id: Long? = null,

    val name: String,
    val description: String,
)
4. application 재시작

5. http://localhost:8080/h2-console/ 입력후 접속

6. 확인

'backend > 코프링' 카테고리의 다른 글
| [코프링] 6. Spring Kotlin Jpa Querydsl 적용, 페이징 예제 (2) | 2025.02.07 |
|---|---|
| [코프링] 5. Spring Jpa Auditing 적용 (0) | 2025.02.07 |
| [코프링] 4. @Valid를 사용한 REST API validation 처리 (2) | 2025.02.06 |
| [코프링] 3. GlobalException handler를 이용한 restApi 에러 처리 (2) | 2025.02.05 |
| [코프링] 1. 프로젝트 생성 (1) | 2025.02.03 |


